The Complete Guide to Eliminating Pet Urine and Odor (Not Just Masking It)
If you’ve tried everything to remove pet urine odor with no success, you’re not alone. Most pet owners struggle because they don’t understand why pet urine is so difficult to eliminate, or they’re using products that simply don’t work. This comprehensive guide teaches you the approach that actually works at the source.This comprehensive guide explains how to remove pet urine odor completely—not just mask it—and when professional help is necessary.
Critical insight: Not all “odor removers” actually eliminate pet odors at their source. Some just cover them with fragrance, others leave residue that makes the problem worse, and many simply fail. This guide teaches you the professional approach that actually works.
• Most products fail because they can’t break down uric acid crystals—the real source of pet odor
• You must treat 2-3x the visible stain size—what you see is only 20-30% of actual contamination
• Your pet’s behavior tells you if it worked—if they keep returning to sniff the spot, odor remains
• Chronic issues need professional help—months/years of repeated marking goes beyond DIY solutions
• Eliminating odors at the source breaks the marking cycle —pets stop returning when they can’t smell their marker
• Not all products eliminate odor — enzymes leave residue your pet can still smell; citrus and fragrance sprays just add a second smell. Level One destroys odor at the molecular level and leaves nothing behind.
(See the full comparison below — or jump straight to Why Most Products Don’t Work.)
Ready to solve your pet odor problem? Shop Pet Odor Solutions → or keep reading for the complete professional approach.
Why Pet Urine Is So Difficult to Eliminate
The Chemistry Behind Stubborn Pet Odors
To understand how to remove pet urine odor permanently, you need to understand what you’re fighting. Pet urine contains three main components:
Urea – Water-soluble and easiest to remove. This is the liquid component that causes the initial wetness.
Urochrome – Gives urine its yellow color. Moderately difficult to eliminate, but not the main odor culprit.
Uric acid crystals – The real problem. These crystals are NOT water-soluble and bond tightly to carpet fibers, padding, and porous materials.
When pet urine dries, uric acid crystals remain locked in your surfaces. These crystals reactivate with moisture—humidity, cleaning attempts, or more accidents—releasing ammonia and that unmistakable smell all over again.
This is why you can’t just clean pet urine like a regular spill.
How Contamination Spreads (Worse Than You Think)
Most people see a small wet spot and think that’s the extent of the damage.
Reality check:
- Pet urine spreads in ALL directions, especially downward
- What you see on the carpet surface is often only 20-30% of the actual contamination
- Gravity pulls liquid through carpet deep into the padding
- On hard floors, it flows into cracks, grout lines, and underneath baseboards
- Porous materials like wood and concrete absorb and hold the contamination
Why surface treatments fail: If you only treat what you can see, you’re missing 70%+ of the actual problem. The odor will return because you haven’t reached the source.
The Professional Carpet Cleaning Discovery
Ever had your carpets professionally cleaned, only to discover a pet urine problem you didn’t know existed?
This is incredibly common and catches homeowners by surprise.
Here’s what happens:
Before cleaning, your carpets seemed fine. You didn’t smell pet odor. Maybe there were a few old accidents months ago, but the smell faded.
Then you get your carpets cleaned.
Suddenly, the entire room reeks of ammonia and pet urine.
What went wrong?
Nothing. The cleaning just revealed the problem that was always there.
Steam cleaning and hot water extraction rehydrate old, dried uric acid crystals deep in the padding. Those crystals weren’t releasing much odor when dry—but once moisture reactivates them, they release intense ammonia smell throughout the room.
The contamination was there all along. You just couldn’t smell it until cleaning added moisture.
The Right Approach:
If you have pets (or previously had pets), diagnose for hidden urine deposits BEFORE scheduling a general carpet cleaning.
Two options:
- DIY detection first: Use a UV blacklight in complete darkness to find hidden urine deposits. Treat those areas completely, then schedule cleaning.
- Find a carpet cleaner who specializes in pet urine: They should:
- Use detection tools (UV light, moisture meters) to locate ALL contamination
- Treat urine deposits as a specialized process (not just general cleaning)
- Address contaminated areas with proper saturation and dwell time
- Follow up with general carpet cleaning once odors are eliminated
This isn’t a normal carpet cleaning job. Pet urine requires targeted treatment of problem areas first, followed by general cleaning.
The cleaning company should identify the deposits, treat them properly, and then clean the entire carpet—not just run a standard wand over everything and hope for the best.
Questions to ask your carpet cleaner:
- “Do you inspect for pet urine before cleaning?”
- “What method do you use to locate urine deposits?” (Look for UV light or moisture detection)
- “How do you treat contaminated areas differently than general cleaning?” (Look for saturation treatment, specialized products, extraction equipment like water claws)
- “What happens if urine smell appears after cleaning?” (They should have a plan to address it)
If they can’t answer these questions confidently, find a cleaner who specializes in pet odor removal—not just general carpet cleaning.
Finding Hidden Pet Urine (Even When You Can’t See or Smell It)
You can’t remove pet urine odor from areas you haven’t found. Here’s how to locate ALL the contamination:
Start With the Obvious
- Known accident spots
- Your pet’s favorite corners or areas
- Behind furniture (pets hide to urinate)
- Areas with discoloration or staining
But don’t stop there. Many urine deposits are completely invisible to the naked eye.
Using a UV Blacklight
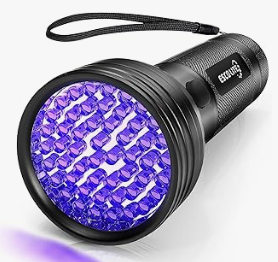
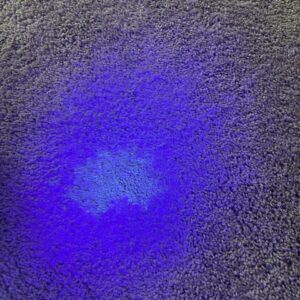
A UV blacklight makes fresh or recent pet urine glow yellow-green in complete darkness. This is your first detection tool.
How to use it:
- Make the room as completely dark as possible by closing blinds and curtains
- Hold the light 1-2 feet from the surface
- Scan slowly across the entire area
- Mark positive spots with tape or chalk
Quality pet urine blacklights cost $15-30 and are worth every penny. Here is a link to the one I have found to work best in most lighting conditions.
When Blacklights Fail (Important Limitations)
Blacklights have significant limitations many people don’t know about:
After carpet cleaning – Cleaning removes surface fluorescent compounds, but uric acid crystals remain deep in padding. The blacklight shows “clean” while the odor persists. This is the most common blacklight failure.
Old, dried contamination – Fluorescent compounds break down over time. Months-old stains may not fluoresce, but uric acid crystals are still present and smelling.
Certain carpet types – Some carpet treatments interfere with fluorescence. Dark carpets make it harder to see the glow.
Deep contamination – If urine has soaked through to padding or subfloor, surface fluorescence may be gone even though the problem is worse than ever.
The Most Reliable Method: Your Pet’s Behavior
Your pet’s nose is 10,000-100,000 times more sensitive than yours. Watch where they:
- Repeatedly sniff the same spot
- Circle or position to mark
- Show territorial behavior
- Return to investigate
These are your real problem areas. If your pet keeps returning to a spot, there’s likely odor-causing urine contamination there—even if you can’t smell it.
Using a Hydrosensor Probe
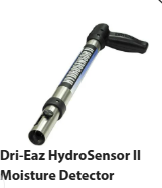
In addition to using a blacklight, professional remediation services use specialized hydrosensor probes to locate hidden urine contamination in carpet padding and subfloor. These are different from standard moisture meters used in flood restoration.
What’s the difference?
A moisture meter is a handheld device that detects general moisture levels—used primarily when flooding occurs to find wet areas in walls, floors, and structures.
A hydrosensor probe is a specialized tool with a sharp probe that penetrates through carpet and pad to detect moisture underneath. While designed for water detection under wet carpet, it works exceptionally well for finding urine contamination because uric acid crystals contain water and conduct similarly to water.
Why hydrosensors work for urine detection:
Uric acid crystals are hygroscopic—they attract and retain moisture from the air. Even “dry” urine deposits contain enough moisture for a hydrosensor to detect. The probe’s sharp points penetrate through carpet fibers into padding where urine has soaked, giving you an audible alert when contamination is present.
When to consider a hydrosensor:
If you’re dealing with chronic issues, multiple pets, or contamination that’s not visible to the naked eye or under blacklight, a hydrosensor ($200-300) can be invaluable for finding the full extent of hidden urine deposits.
Important: Don’t confuse these with basic moisture sensors or meters. Hydrosensors are specialized probes designed for carpet and pad inspection—a different tool for a different purpose.
Start simple, scale up as needed:
Step 1: Look for visible spots (discoloration, staining)
Step 2: Use UV blacklight in complete darkness to find spots you can’t see
For most typical pet accidents, these two methods are sufficient for DIY treatment.
When you need professional help:
If you have chronic, long-term odor issues and keep finding spot after spot throughout your home, you’re likely dealing with extensive contamination that requires professional remediation.
Important: Make sure your professional uses proper diagnostic methods to find ALL contamination—not just visible spots. Ask them:
- “Do you use UV blacklight detection?”
- “What tool(s) do you use to find deep contamination (hydrosensor)?”
- “How do you verify you’ve found all the affected areas?”
Professionals should use BOTH blacklight and hydrosensor methods for comprehensive detection on chronic cases.
Carpet Cleaning companies should use a water claw for deep extraction of urine in contaminated areas.
Why blacklights sometimes fail: Carpet cleaning removes surface fluorescent compounds while uric acid crystals remain deep in padding. The blacklight shows “clean” but the odor persists. This is when hydrosensors become essential for finding hidden contamination.
Why Most Pet Odor Products Don’t Work
If you’ve wasted money on products that promised to eliminate pet odors but didn’t, you’re not alone. Most products fail for predictable reasons.
Fragrance-Based Products (The Obvious Failure)
These products don’t remove the source of the pet urine odor—they cover it with perfume.
You end up with a house that smells like lavender AND pet urine. Even worse, your pet can smell right through the fragrance, so they keep marking the same spot.
The compound problem: Heavy artificial fragrances trigger allergies and sensitivities. Now you’re dealing with pet odor PLUS cloying perfume smell that won’t go away.
These products fail completely at stopping re-marking behavior because they don’t eliminate the scent marker your pet is following.
Some popular citrus oil sprays contain linalool and d-limonene — ingredients documented as contact allergens in peer-reviewed dermatology research (Sindle & Martin, 2021, PMC8243157). Benzyl benzoate, another ingredient in some of these products, is considered toxic to cats according to its own label warnings. Before using any fragrance-based product, read the label carefully — particularly if you have a cat or a bird in the home.
Enzyme-Based Cleaners (The Inconsistent Failure)
Enzyme cleaners work by using bacteria to eat organic material. Sounds good in theory.
The problem?
Enzymes are incredibly unpredictable. They require:
- Perfect temperature range
- Specific moisture levels
- Correct pH balance
- Hours or even days to work (if they work at all)
The residue problem: Even when enzyme cleaners “work,” they leave biological residue behind—dead bacteria, enzyme proteins, and organic breakdown products. This residue:
- Creates sticky buildup that attracts dirt
- Is difficult or impossible to fully rinse from carpet
- Can retain faint scent markers
- Allows pets to still smell their mark and return to the spot
This is why enzyme cleaners often seem to work initially, but your pet keeps marking the same area. The marker is still there—you just can’t smell it. Your pet can.
Some enzyme products add fragrance to their formula — meaning your pet encounters both enzyme residue and added scent compounds at their marking spot. Two reasons to return instead of one. If your pet keeps going back to an ‘enzyme-cleaned’ spot, this is likely why.
DIY Home Remedies (The Chemistry Failure)
Vinegar, baking soda, hydrogen peroxide mixtures—these circulate endlessly online because they’re cheap and people are desperate.
None of them address the actual chemistry of pet urine. They might help with fresh spills on hard surfaces, but they cannot break down uric acid crystals once they’ve bonded to fibers.
Worse, some combinations (like mixing vinegar with other cleaners) can create reactions that set stains permanently or damage your surfaces.
What Actually Eliminates Pet Urine Odor
To truly remove pet urine odor, you need a product that:
- Breaks down uric acid crystals (not just surface cleaning)
- Penetrates deep into padding and porous materials
- Works fast and reliably (no waiting days hoping it works)
- Leaves no residue (nothing for your pet to smell and re-mark)
- Has no fragrance (because truly eliminated odor needs no masking)
Level One’s pet urine oxidizer technology meets all these criteria. It destroys odors at their source by breaking down organic compounds at the molecular level through a controlled chemical reaction—not unpredictable biological processes.
The difference: Oxidizer technology works quickly and reliably without requiring the perfect conditions that enzyme cleaners need. No waiting days. No residue. No fragrance needed.
This is the same professional-grade approach used by odor removal services when homeowner products fail.
The biggest advantage of Level One’s oxidizer technology over enzyme cleaners isn’t just speed (10 minutes vs. days)—it’s behavioral results.
Level One destroys odors at their source through complete oxidation, leaving zero residue. Your pet can’t find their mark anymore. They stop returning to the spot.
Enzyme residue, even after “successful” treatment, often leaves enough scent for pets to keep marking. This is why customers tell us their pets finally stopped marking after switching from enzyme cleaners to Level One.
How to Remove Pet Urine Odor: Complete Step-by-Step Process
Here’s the professional approach to eliminate pet urine odor completely:
Step 1: Find All Contamination
Use the detection methods above to locate EVERY spot. Don’t rely only on what you can see or smell.
Fresh accidents are obvious, but chronic issues require thorough investigation with UV light or moisture meter.
Step 2: Remove Excess Material
For fresh accidents:
- Blot up as much liquid as possible with paper towels or clean rags
- Apply pressure to pull urine from padding
- Don’t rub—this spreads contamination
- Continue blotting until towels come away mostly dry
For solid waste:
- Remove all solid material completely
- Use disposable gloves and proper cleanup
- Blot any remaining liquid residue
Step 3: Clean Previous Product Residue (Critical Step)
If you’ve used other products before, you need to remove that residue first—but do this carefully to avoid making the problem worse.
Why this matters:
Old enzyme cleaner residue, perfume oils, or other product buildup can:
- Interfere with proper treatment by coating the area
- Prevent new products from penetrating
- Create chemical cross-reactions that damage carpet or flooring
- Produce toxic fumes when mixed with certain chemicals
SAFETY FIRST – Always test in an inconspicuous area:
Before treating the problem area, test your product on a hidden section of carpet (closet corner, under furniture) to ensure:
- No discoloration or damage to carpet fibers
- No adverse reaction with previous cleaning compounds
- Product is safe for your specific carpet type
This test is especially critical if the problem area has been treated with previous chemicals.
How to prep the surface:
The careful approach:
- Blot the area with clean, damp towels (don’t oversaturate)
- Use a wet vacuum if available to extract old product residue
- Work from the outside edges toward the center to avoid spreading contamination
- Let the area dry completely before applying new treatment
Acid-based cleaners like vinegar can interfere with the effectiveness of oxidizer technology. Before applying Level One to an area previously treated with vinegar, neutralize the surface first: apply a light solution of baking soda and water, let it sit for five minutes, blot dry, and allow the area to dry completely before treating with Level One.
Important caution: Excessive water or hydration when removing old products can spread urine contamination deeper into padding and underlayment. Use the minimum moisture necessary to remove surface residue.
If you’re uncertain:
- Skip the rinsing step entirely
- Test your new product directly on a small area first
- If it works without removing old product, proceed carefully
This step takes time, but it prevents treatment failures and protects your carpet from chemical damage.
Step 4: Apply Treatment Correctly (Most Important Step)
This is where most people fail—even with good products.
The golden rule: SATURATE the area.
You must treat 2-3 times the size of the visible stain. Pet urine spreads far beyond what you can see.
Why contamination spreads so far:
Urine breaks down surface tension as it penetrates carpet fibers. This allows it to spread in all directions—not just straight down. Think of it like dropping oil on fabric: it doesn’t stay in one spot, it wicks outward through the fibers.
As urine travels through carpet, padding, and potentially into subflooring, it creates a contamination zone much larger than the visible surface stain. What you see on top is just the center of a much wider affected area.
This is why treating only the visible spot always fails—you’re missing 70-80% of the actual contamination.
For carpet:
- Saturate the area generously—the carpet should be damp underneath
- Work the product into the fibers with your hand or soft brush
- Treat at least 6 inches beyond the visible stain in all directions
- For chronic spots, treat even larger areas
For hard surfaces:
- Flood grout lines and cracks where urine has penetrated
- Let the product sit in place to penetrate porous materials
- Don’t wipe away immediately—give it time to work
Critical point: If you’re unsure whether you’ve used enough product, you probably haven’t. Light spraying does nothing. The product must reach ALL contaminated material.
The product must penetrate DOWN to reach the contamination at its source—not just sit on the surface.
If you’re wondering “is this enough product?” the answer is probably NO.
For fresh accidents (you saw it happen and treated immediately):
- Urine went straight down but may not have spread as far horizontally yet
- Still treat beyond the visible spot to ensure you get all contamination
- The carpet padding underneath should feel damp when you touch it
For older stains (hours, days, or weeks old):
- Urine has spread 2-3x wider than the visible stain
- Treat a much larger area—at least twice the diameter of what you see
- Deep saturation is critical to reach all contaminated material
The test: Touch the carpet and feel underneath. If the padding doesn’t feel damp, you haven’t used enough product. The treatment must reach where the urine went—down to the source of the odor.
Surface spraying does nothing. Even with the right product, under-saturation means treatment failure. You must penetrate to destroy odors at their source.
Step 5: Wait for Complete Treatment
Professional-grade oxidizers work in 10 minutes when properly applied. Enzyme cleaners (if using them) may take hours or days.
During this time:
- Do NOT walk on treated areas
- Do NOT let pets near the area
- Do NOT add more products
- Let the chemistry work
Step 6: Blot Excess and Air Dry
After the treatment time:
- Blot excess liquid from carpet (for hard surfaces, let evaporate)
- Place fans to improve air circulation
- Keep area off-limits until completely dry (6-12 hours for carpet)
- Do NOT walk on damp carpet—this compresses fibers and pushes product away from contamination
Step 7: Test for Complete Elimination
The human test: Smell the area after it’s completely dry. No odor? Good start.
The pet test (most reliable): Watch your pet’s behavior around the treated spot over the next few days.
Success indicators:
- Pet shows no interest in the area
- Doesn’t sniff or investigate repeatedly
- Doesn’t position to mark
- Moves on as if the spot doesn’t exist
Treatment incomplete:
- Pet returns to sniff the spot
- Shows marking behavior (circling, positioning)
- Re-marks within days
If your pet keeps returning, the odor isn’t fully eliminated. They can still smell their marker. Retreat the area with a larger treatment zone.
Your pet’s nose is 10,000-100,000x more sensitive than yours. Trust their behavior, not your nose.
✓ Treatment Worked:
- Pet shows no interest in the spot
- Doesn’t sniff repeatedly
- Moves on as if spot doesn’t exist
✗ Treatment Incomplete:
- Pet returns to sniff
- Shows marking behavior (circling, positioning)
- Re-marks within days
If they keep returning, there’s still odor there. Retreat with a larger area.
8 Common Mistakes That Make Pet Odor Impossible to Remove
Learn from others’ failures. These mistakes keep people trapped in the cycle of pet odor problems:
Mistake #1: Treating Only the Visible Spot
Contamination spreads 2-4 times wider than the visible stain. Treating only what you see leaves untreated urine underneath that continues smelling.
Solution: Always treat at least 2x the visible stain size, preferably 3x for older stains.
Mistake #2: Not Using Enough Product (Under-Saturating)
Light surface spraying doesn’t work. Pet urine is in the padding—your product must penetrate there to eliminate the odor.
If the carpet doesn’t feel damp on the underside, you haven’t used enough.
Solution: Saturate generously until product reaches all contaminated material. Use more than feels necessary.
Mistake #3: Not Removing Previous Product Residue
Layers of old enzyme cleaners, perfume sprays, and cleaning products create a barrier. New treatments can’t penetrate through this buildup.
Solution: If possible, extract or rinse previous products before applying new treatment. This step dramatically improves results.
Mistake #4: Using Enzyme Cleaners and Expecting Different Results
If enzyme cleaners haven’t worked after multiple attempts, they’re not suddenly going to work. The residue they leave behind may actually be making the problem worse by providing something for your pet to smell and mark.
Solution: Switch to complete elimination methods (professional-grade oxidizers) that leave zero residue.
Mistake #5: Steam Cleaning Before Proper Odor Treatment
Heat can set protein-based stains permanently. More importantly, steam cleaning rehydrates old uric acid crystals and spreads contamination wider.
This is why carpets often smell WORSE after cleaning.
Solution: Completely eliminate odors FIRST with proper treatment, then clean if needed.
Mistake #6: Walking on Treated Areas Before Dry
Walking compresses carpet fibers and pushes product away from contamination. It also spreads untreated urine to new areas via your shoes.
Solution: Block off treated areas completely for 6-12 hours until bone dry. This is non-negotiable for success.
Mistake #7: Mixing Different Products
Chemical interactions can neutralize effectiveness. Some combinations create harmful compounds.
Examples of dangerous combinations:
- Enzyme cleaners + oxidizers = Dead enzymes, wasted oxidizer
- Bleach + ammonia (in urine) = Toxic gas
Solution: Use ONE method at a time. If switching products, clean the area between treatments.
Mistake #8: Giving Up After One Treatment
Older stains or deep contamination may need 2-3 applications. Each treatment breaks down more crystals and penetrates deeper.
But: If your pet keeps returning to the spot after multiple proper treatments, you’re not treating a large enough area or the contamination is too deep for DIY methods.
Solution: Retreat until your pet’s behavior confirms complete elimination. Their nose tells you when you’ve truly succeeded.
When Professional Treatment Is Necessary
Be honest about your situation. Not all pet odor problems can be solved with retail products, no matter how good they are.
Clear Signs You Need Professional Help
1. Chronic long-term contamination:
- Same spot used repeatedly over months or years
- Multiple pets marking the same areas consistently
- Previous owner’s pet issues discovered after moving in
- Entire rooms smell, not just specific spots
2. Structural penetration:
- Urine has soaked completely through carpet into padding
- Subfloor damage visible (staining, warping, soft spots)
- Discoloration or damage to hardwood floors
- Smell clearly coming from underneath the flooring
3. Large-scale problems:
- Whole rooms affected (not isolated accidents)
- Multiple rooms throughout the house
- Basement or concrete slab saturation
- Odor noticeable from outside or immediately upon entry
4. Failed treatment attempts:
- You’ve properly used quality products with no improvement
- Smell returns within hours of treatment
- Area stays damp or develops mold
- Problem getting worse despite correct application
What Professional Treatment Includes
When DIY methods can’t reach the problem, professionals have tools and techniques you don’t:
- Professional-grade detection equipment (moisture meters, thermal imaging, air quality testing)
- Complete carpet and padding removal when necessary
- Subfloor treatment and sealing
- Replacement of damaged materials that can’t be saved
- Truck-mounted extraction systems for deep contamination
- Professional-grade gas treatment systems for severe cases
- Structural assessment and repair recommendations
Why Retail Products Can’t Fix Everything
Surface treatments—including professional-grade retail products—work through direct contact with contamination. When pet urine has penetrated deep into materials or soaked into porous subflooring over months or years, no surface spray can reach it all.
Professional remediation addresses the structure itself, not just the surface.
The Cost Reality
Professional treatment for severe pet urine issues typically costs $500-2,000+ depending on scope. In extreme cases requiring flooring replacement, costs can reach $3,000-10,000+.
But consider:
- Living with the problem affects your home’s value, your health, and your quality of life
- Continued failed DIY attempts waste money and time
- Proper professional remediation solves the problem permanently
How to Decide
Try DIY first if:
- Fresh to recent accidents (days to weeks old)
- Isolated spots or small areas
- No visible structural damage
- Smell is localized to surface areas
Call professionals if:
- Chronic issues over months or years
- Widespread contamination
- Visible subfloor or structural damage
- DIY methods have failed after proper application
Still unsure? Try quality products on a test area first. If proper application doesn’t work after 2 attempts, it’s likely beyond retail product capabilities.
Contact us for honest assessment—we’ll tell you if professional help is needed.
Prevention and Long-Term Maintenance
Once you’ve successfully removed pet urine odor, here’s how to stay odor-free and break the marking cycle permanently.
Understanding Pet Marking Behavior
Pets are scent-driven creatures. When they smell their own urine, it triggers territorial marking behavior:
- Pet marks spot
- Smell remains (even if you can’t detect it)
- Pet smells their marker
- Scent triggers instinct to mark again
- Cycle repeats endlessly
Breaking the cycle requires COMPLETE odor elimination. Anything less and your pet continues the pattern.
Why Complete Elimination Stops Re-Marking
When odor is truly eliminated with zero residue:
- Pet can’t smell their own mark anymore
- Area no longer triggers territorial behavior
- Pet stops returning to the spot
- Marking cycle is broken permanently
This is fundamentally different from masking or incomplete treatment. Your pet has 10,000-100,000 times more scent receptors than you. What seems “clean enough” to you still screams “MY TERRITORY” to your pet.
Quick Response Protocol for Fresh Accidents
Once the marking cycle is broken, keep it broken with immediate response:
For new accidents:
- Clean up immediately (within minutes if possible)
- Blot excess liquid thoroughly
- Apply treatment while still fresh
- Saturate 2x the visible area
- Complete elimination before urine dries = easier treatment
Benefits of immediate treatment:
- Prevents uric acid crystal formation
- Stops scent marker from setting permanently
- Easier complete elimination
- Pet doesn’t establish the spot as marking territory
Stock Your Supply
Keep treatment products on hand so you can respond immediately to accidents. Don’t wait until after an accident happens to order product—those hours of delay let urine soak deeper and crystals begin forming.
When Marking Continues Despite Complete Elimination
If your pet keeps marking after you’ve truly eliminated all odors (verified by their lack of interest in previously marked spots), the issue isn’t odor—it’s behavioral or medical:
Medical causes:
- Urinary tract infections
- Kidney disease
- Diabetes
- Age-related incontinence
Behavioral causes:
- Stress or anxiety
- Territory disputes with other pets
- Incomplete house training
- Separation anxiety
- Changes in household routine
When to consult professionals:
- Veterinarian – Rule out medical issues first
- Veterinary behaviorist – For anxiety, stress, or behavioral problems
- Professional trainer – For house training or territory management issues
Complete odor elimination solves the scent trigger, but won’t fix underlying medical or behavioral problems.
Ready to Eliminate Pet Odors?
Now that you understand how to remove pet urine odor completely, choose the option that works for your situation.
What to look for in a pet urine and odor remover:
✓ Destroys odors at their source—breaks down uric acid crystals at the molecular level
✓ Works fast and reliably (10 minutes, not days)
✓ Leaves zero residue (nothing for pets to smell)
✓ No fragrance (truly eliminated odor needs no masking)
✓ Professional-grade formulation
✓ Safe for family and pets when used as directed
View Level One Pet Urine and Odor Remover Options →
Choose your kit:
- Starter Kit ($19.99) – Perfect for trying professional-grade treatment
- 2-Pack ($26.99, FREE SHIPPING) – Best value, always have supply ready
- 4-Pack ($44.99, FREE SHIPPING) – Maximum savings for multi-pet homes
Still Have Questions?
Visit our FAQ page for answers to:
- How much product do I need for my situation?
- Is it safe to use around my pets?
- What surfaces can I treat?
- What if it doesn’t work for my specific problem?
Need personalized guidance? Contact us – we’ll give you honest advice about whether DIY treatment is appropriate for your situation or if professional help is needed.
About this guide: Written from years of professional odor removal experience. We’ve seen hundreds of pet urine situations and know what actually works versus what just wastes your money. This guide shares those professional techniques so you can eliminate pet odors yourself—when DIY is appropriate.